
The fact of the matter is that, while Ford will tell you it’s impossible, it is now (technically) possible to convert your base model Ford Escape, Kuga, or C-MAX to have Sync 3.
The problem?
The entire dash for Sync 1 is a different part number than the dash for Sync 2 and Sync 3. The mounting points for the screen do not exist on the base Sync 1 dash, making it unlikely to be able to make the factory brackets for the screen to work, so something custom will likely have to be done.
It’s not easy. This tutorial is NOT for the feint of heart. If you are creative and inclined enough to try to replicate this project in your own vehicle, we take no responsibility for any of your actions. Do this project at your own risk. Awesome images and general guidance for this post has been graciously provided by NaviUpgrade customer, Brice who completed his Escape Base to Sync 3 upgrade on 1/26/2022.
Parts List
- Sync 3 Display
- Sync 3 APIM
- Ford Escape Display Mounting Bracket (custom made is best for this project)
- Ford Escape Top Panel Cover (CJ5Z-78044D70-EC)
- Upper Mounting Bracket (CJ5Z-78044F80-A)
- Trim Controls Panel (you can either use the base Sync 3 or Sony trim controls panel for this)
- Audio Control Module from an Escape/Kuga/C-MAX with an 8″ Display (mounting your factory base one is difficult, so we recommend getting the upgraded version which is mean to be mounted in the upper position)
- Dual Port USB Hub
- Hub Size Adapter
- Mini USB to Mini USB Cable
Materials List
- Aluminum L Stock
- Self Tapping Screws
Tools List
- Dremel Tool with cutoff wheel (for cutting dash plastic)
- Drill
- Hack Saw (for cutting aluminum channel)
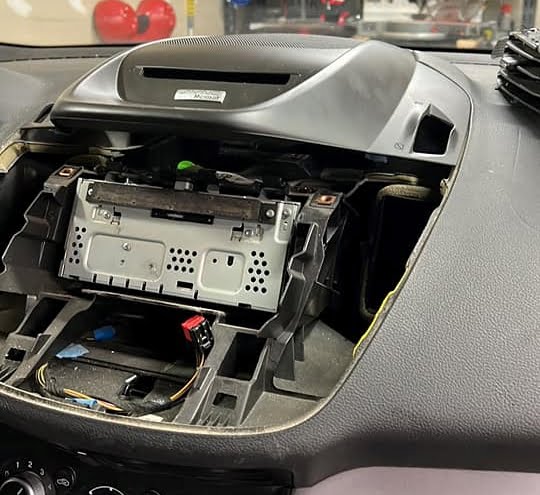
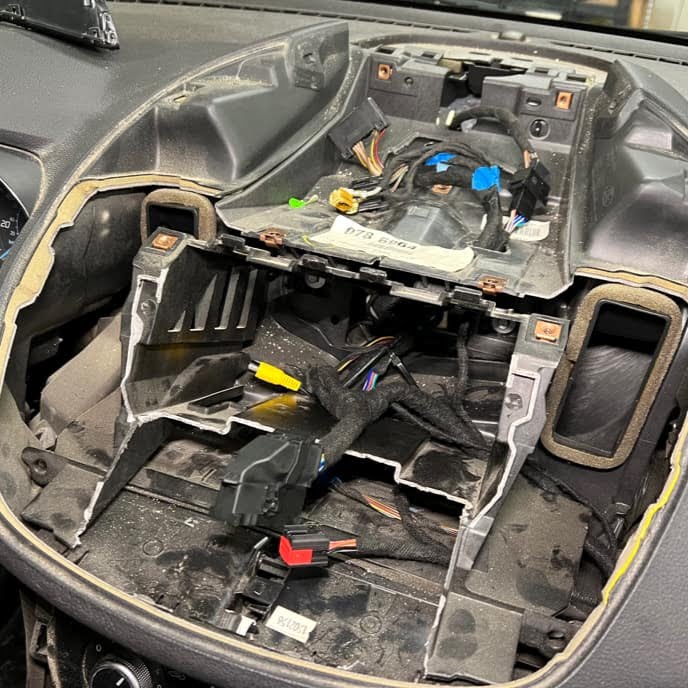
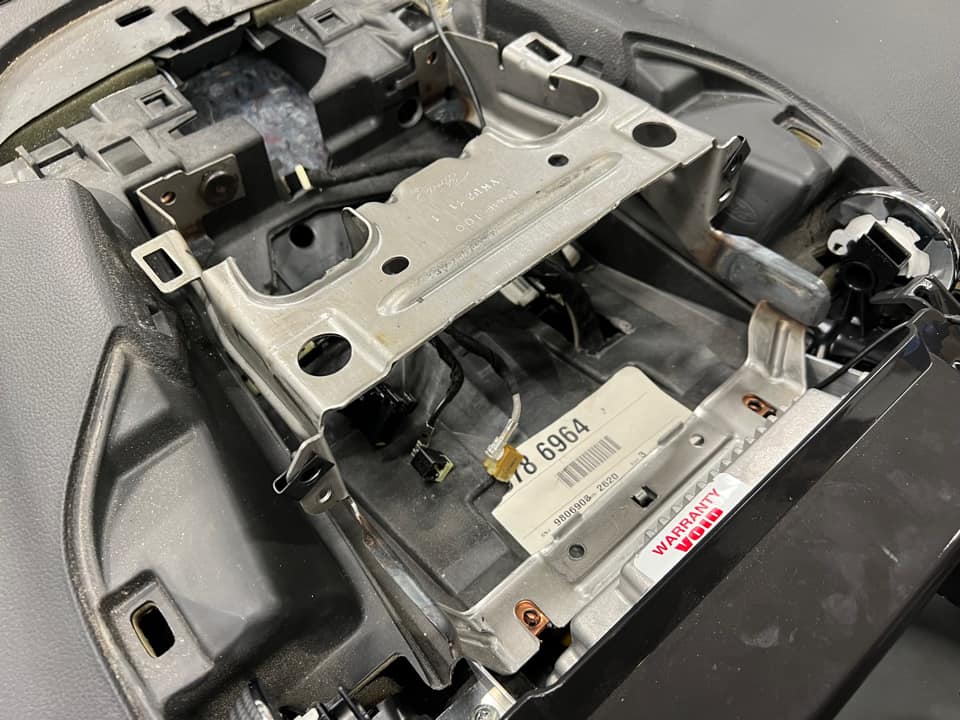
The Starting Point
This is where we’ll all inevitably start with a Escape/Kuga/C-MAX Sync 3 conversion. Disassembly from here is fairly straightforward. First, we pop off the top trim of the 4″ display (using trim tools and force) and it will come off.
Then we are presented with 7mm screws to remove the front panel and the 4″ display. We can disconnect the display at this time. Keep an eye on the 12pin connector for this as we’ll be plugging in our 4″ to 8″ connector to this.
Remove the Audio Control Module held in by two 7mm screws.
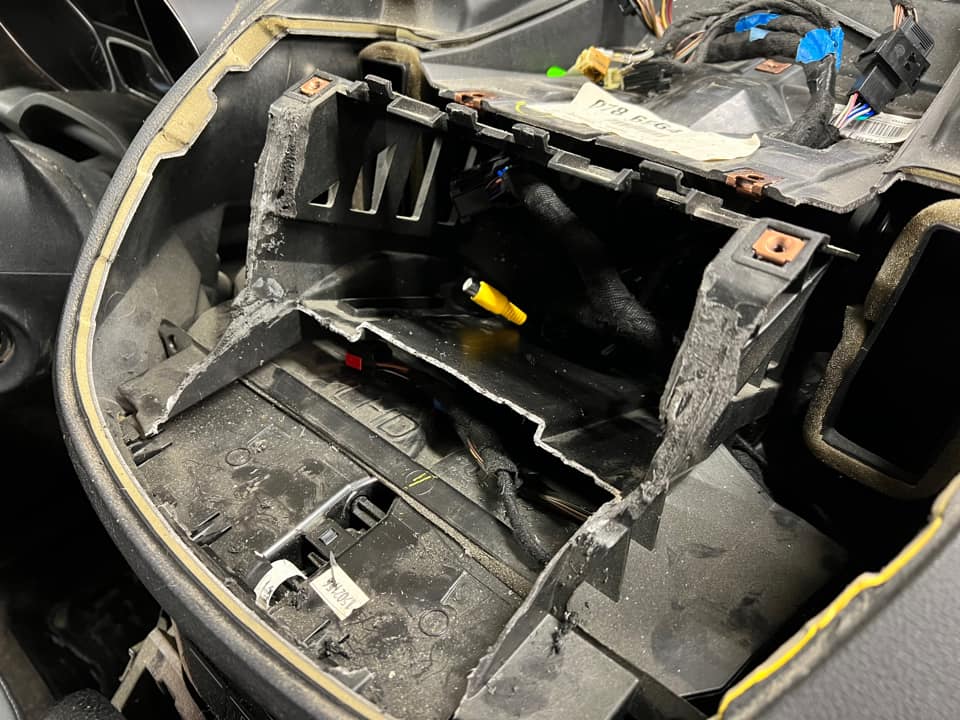
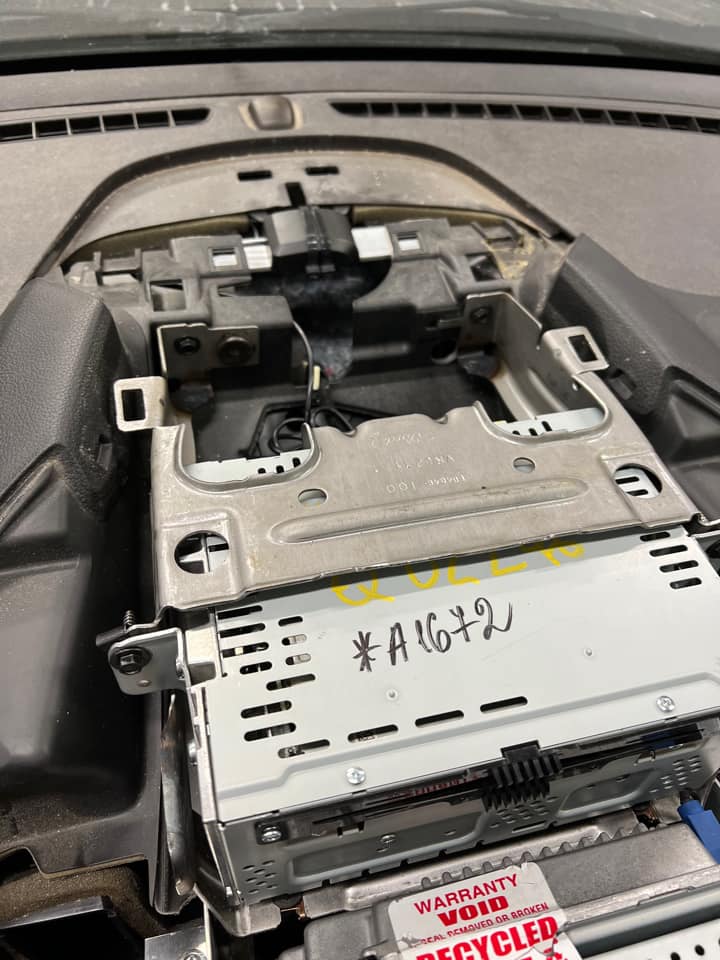
Test Fitting
Here we can see that the dop trim panel simply sits in the proper location without any modification to the dash. This is a good thing! Now we have to work on cutting back the OEM Sync 1 dash to properly fit the Sync 3 Display & APIM Module.
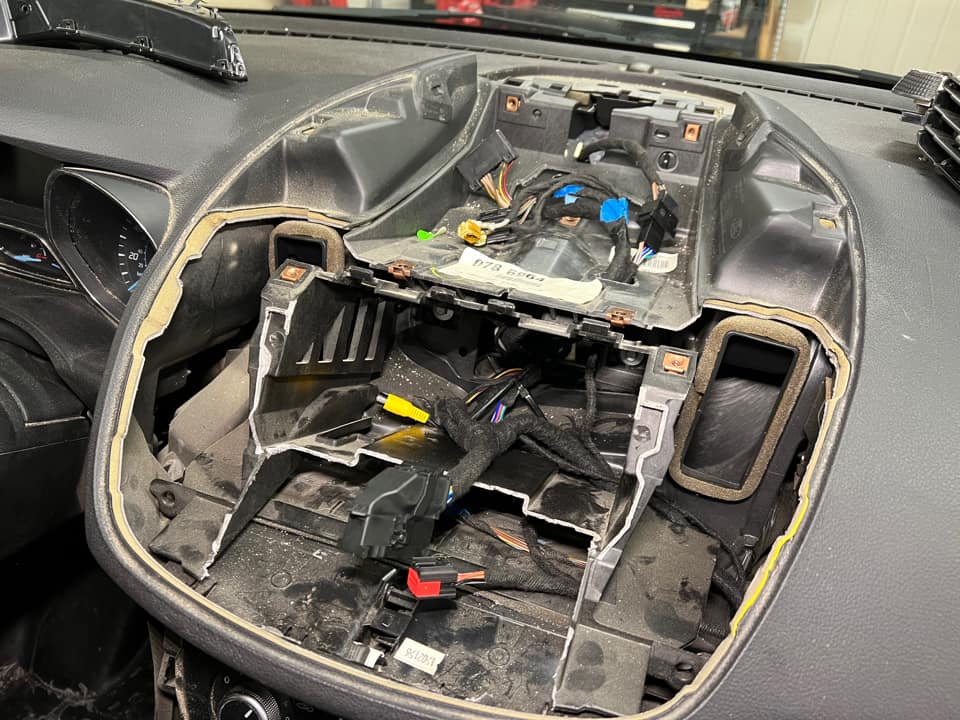
Cutting the Dash
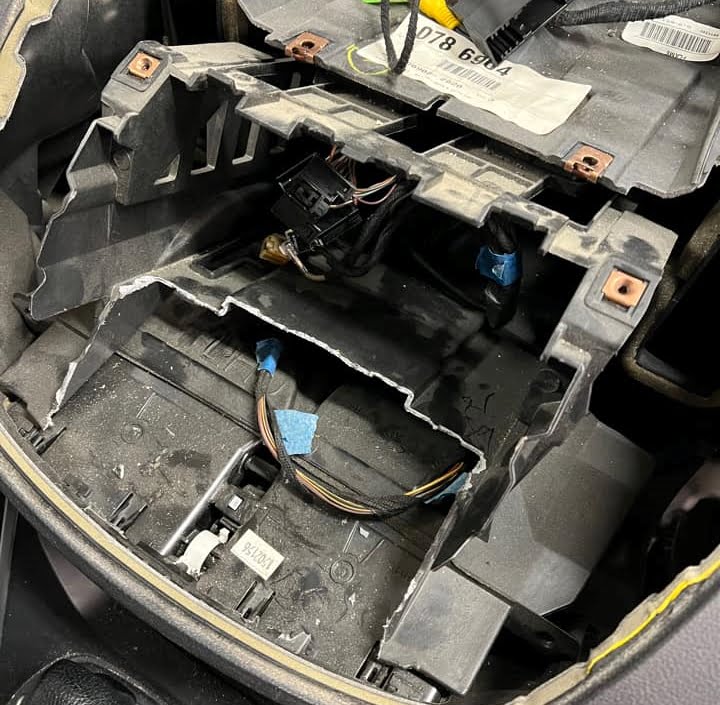
Here it is extremely important to go slow and take your time cutting the dash. Our goal is to create an area for the Sync 3 display to rest where it can sit flush between the trim controls panel and the display itself, without a large gap.
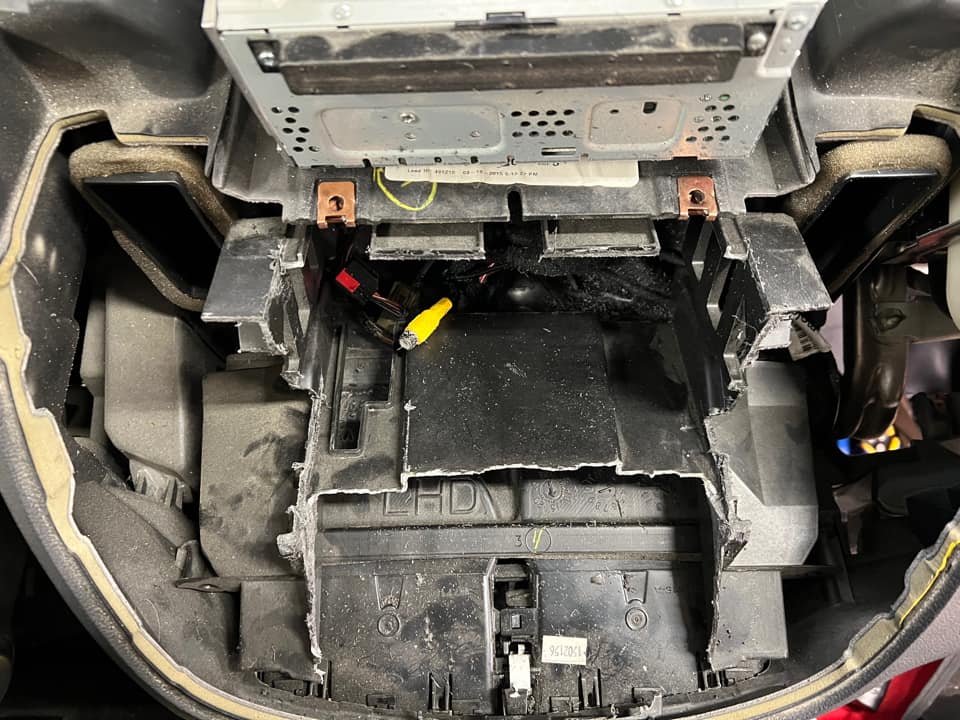
With this cut, we can see that our trim panel can now fit in the area nicely!
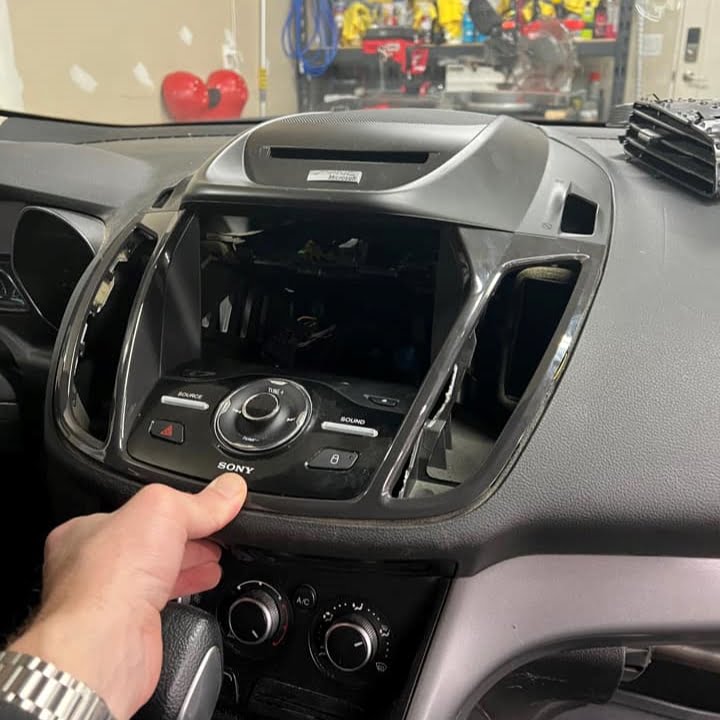
After test fitting the screen, we find that we do need to cut the dash a bit more. Here’s a photo of that.
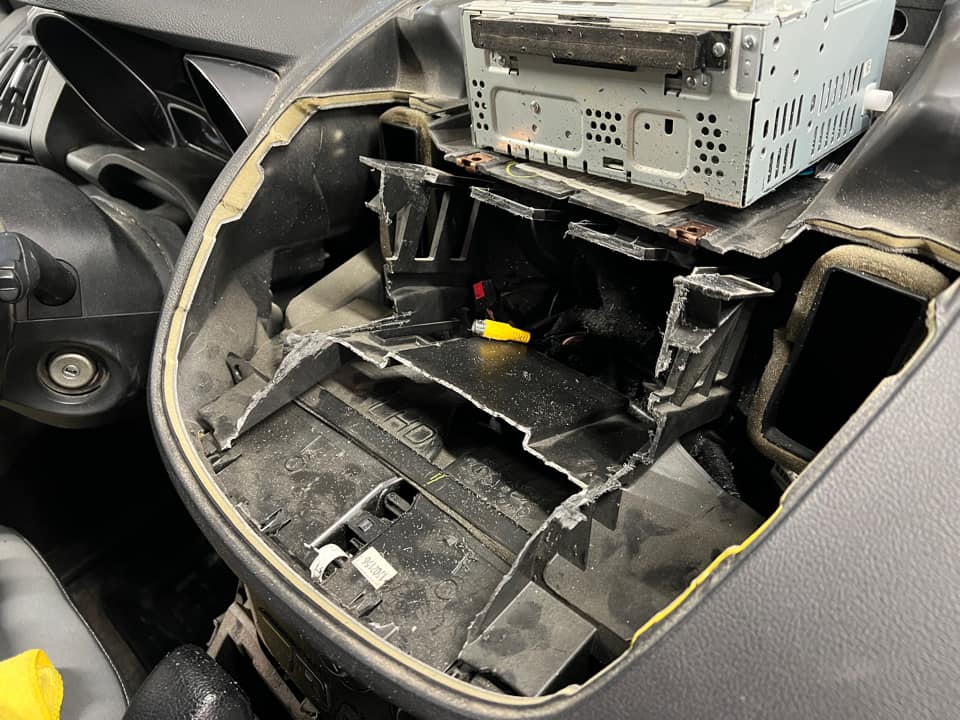
And here is the final cut…
Running the NaviUpgrade Conversion Harness
Now’s a good time to start making connections to the original Sync box and routing all cables up to the area where Sync 3 will live. Accessing the area where your base Sync APIM lives may prove to be difficult and require disassembly of your center console.
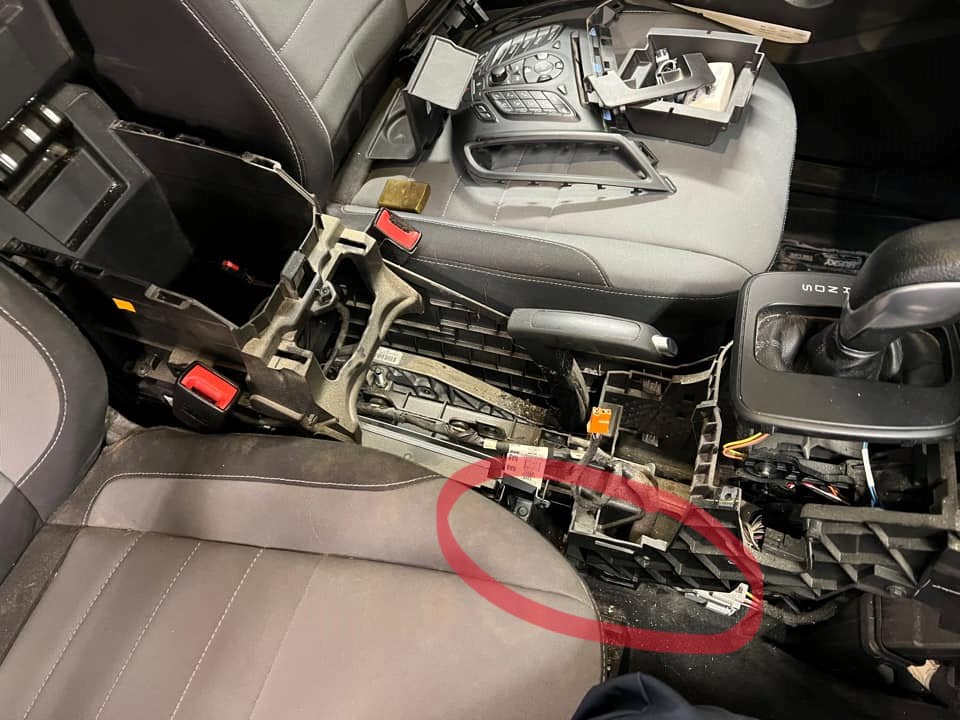
You may need to unhook the factory APIM harness and bring it back towards the dash a bit for the NaviUpgrade harness to reach all the way to it. This harness is designed for a multitude of cars, which makes it a bit difficult to make the perfect length for all vehicles without there being to much, or too little harness length.
From there we can route the harness and get it plugged into the old 4″ display port to make sure our OEM backup camera is functional, along with providing vital signals for steering wheel controls and CANBUS communication.
We’ll want to plug in our OEM front controls panel connector into the harness, and leave the harnesses (red) connector exposed as this brings in new CAN signals to use with the new controls panel. The 54-pin swivel latch connector will go just above this so that the display can be properly plugged in. Off of this we have an optional RCA connection so that you can plug in any aftermarket reverse camera that you wish.
And that’s about it for routing the NaviUpgrade Escape/Kuga/C-MAX 4″ to 8″ conversion harness! Remember that if you are in Europe or have a global vehicle, you will need to check and see if your vehicle’s bluetooth connection is called “Ford Audio.” If this is the case, you’ll need to use our Easy Ford Bluetooth Voice Control (BVC) to Sync 3 Harness.
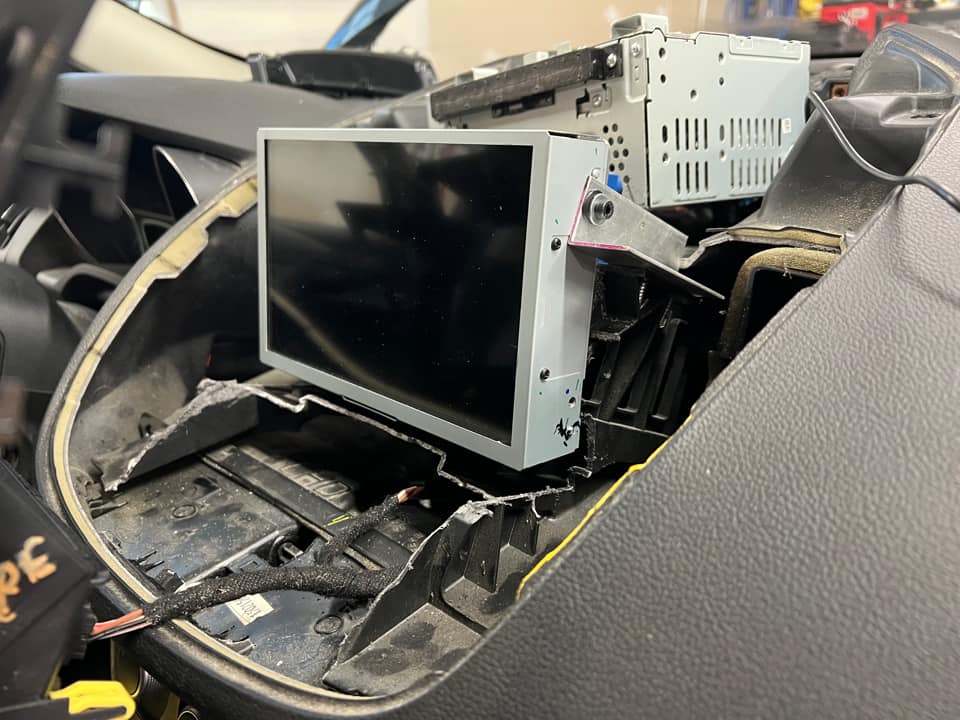
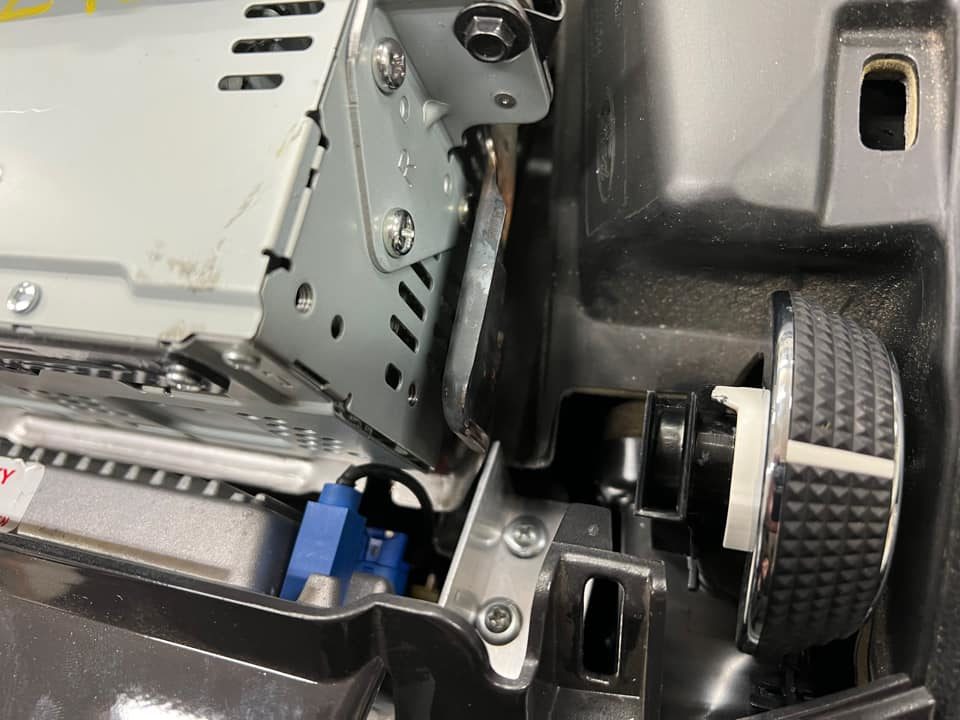
Mounting the Display
This is where things get fun. We’re going to use some aluminum L-angle stock to mount the display and create a bracket. Two small 2″ to 3″ long pieces should be more than enough to get the job done. We’ will drill a hole in the aluminum stock to mount our monitor to, and then use self-tappers to drill into the plastic bracing behind the display. With the proper cutting, the monitor should feel wedged into place and only need to be mounted attached to the display from the two topmost mounting screw holes.
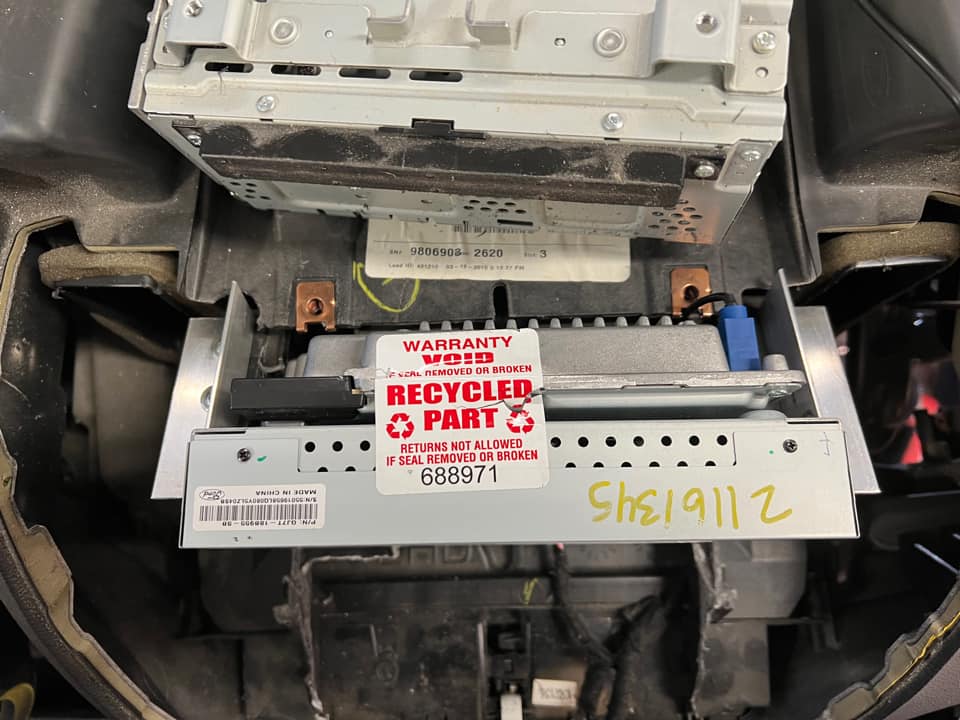
Mounting the Audio Control Module (ACM)
Here we’ll use Ford Part #CJ5Z-78044F80-A to mount our Audio Control Module. Fortunately this all rests into place with factory mounting points, and factory 7mm screws.
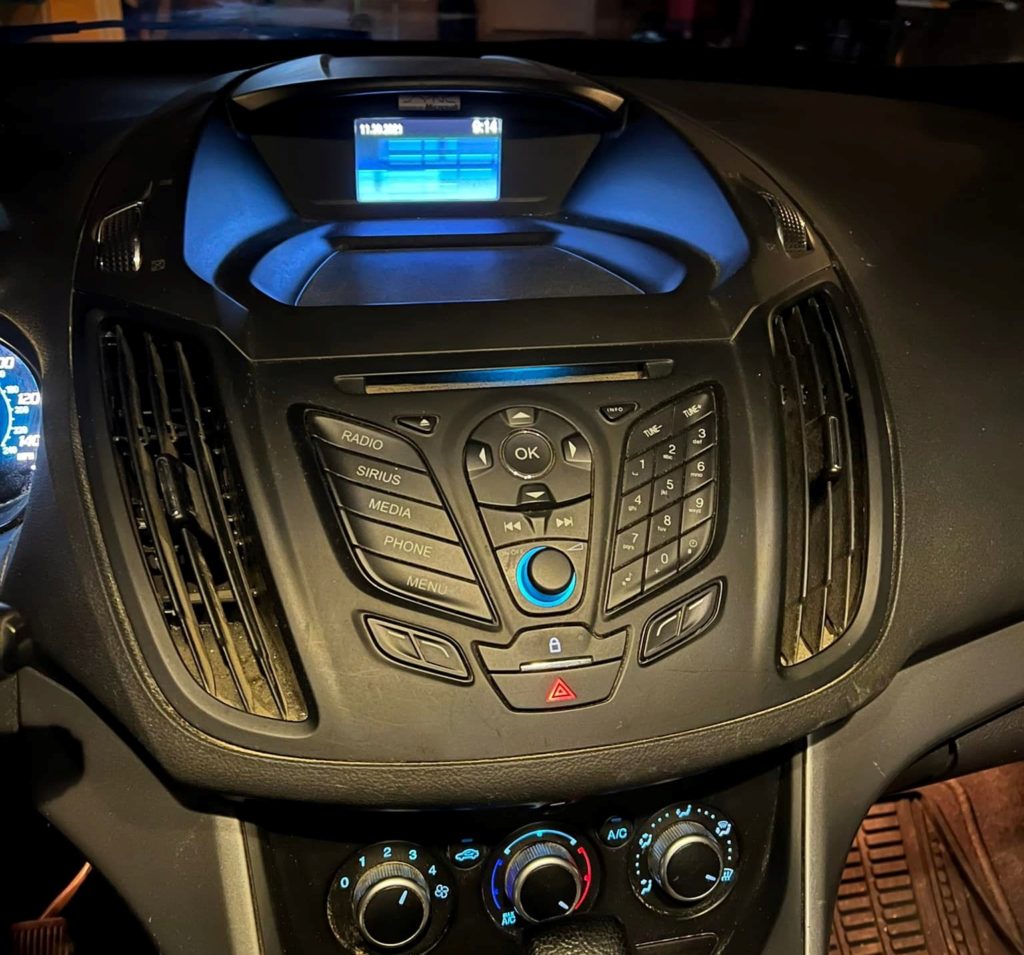
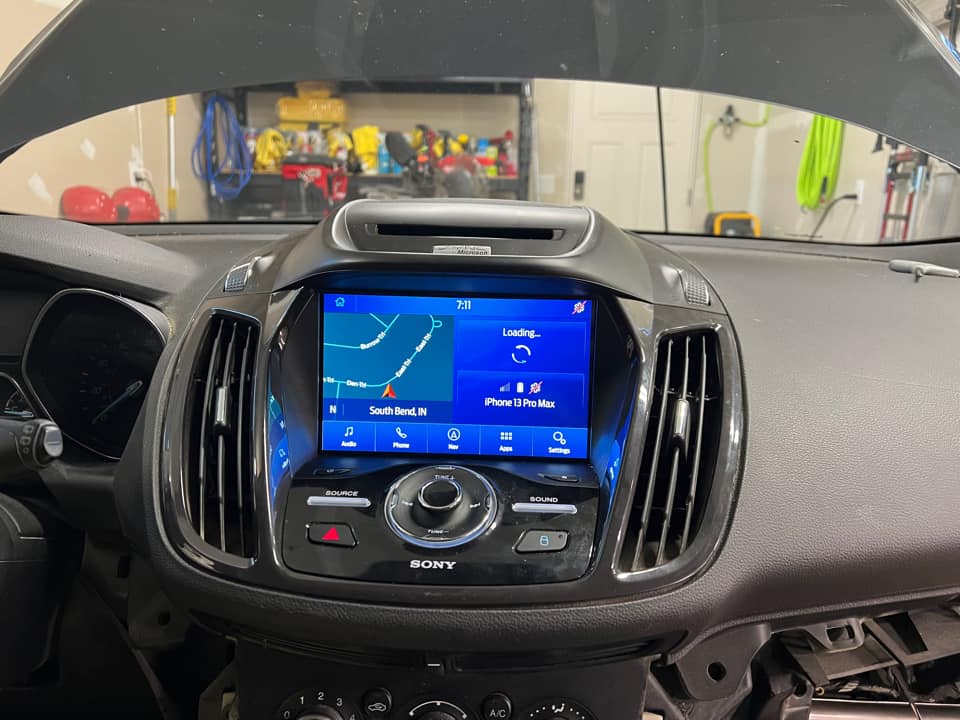
The Final Result
News flash, it’s just like OEM!
A big thank you to Brice over in the 2013+ Ford Escape Owners Facebook Group who took the plunge and entrusted the NaviUpgrade 4″ to 8″ Conversion Harness for his project. We truly appreciate all of his hard work and willingness to document this and allow us share it with the Escape, Kuga, C-MAX, and NaviUpgrade community. We hope this gives you some confidence in doing this project yourself.
If you have any questions, feel free to shoot us a support ticket using our contact form and I’d be happy to help you out the best that I can.
If you’re looking for more sources on the conversion, I’d highly recommend checking out these links:
4 to 8 Sync dashboard information | 2013+ Ford Escape Forum
Kuga Sync 2 Retrofit | Ford Kuga Owners Club Forums
MyFord Touch Facelift для Ford Kuga 2013 — Ford Kuga, 1.6 liter, 2013 year on DRIVE2